- Home
- Services/IndustriesServicesindustries
- About Us
- LocationsStatesAccordion ContentAccordion ContentAccordion ContentAccordion Content
- Job Openings
- Quick Links
- ATS Family

The Importance of 3D Inspections
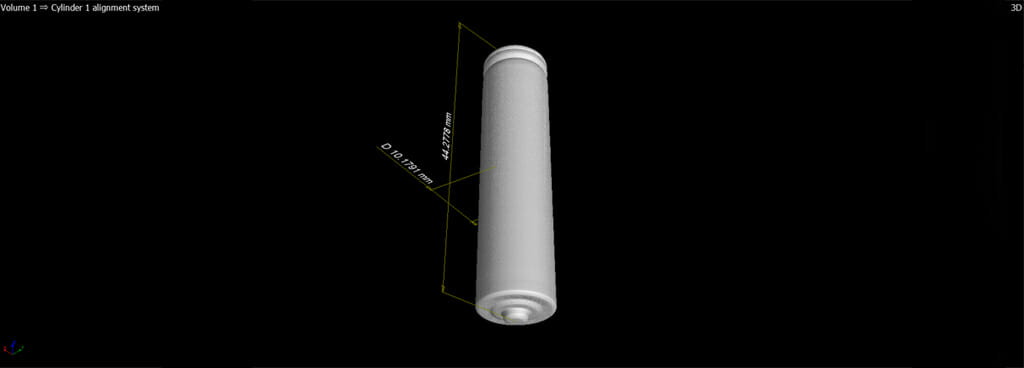
Applied Technical Services performs 3D inspections using CT scanning to detect flaws or defects in the structure of product components. Because of the X-ray factor involved in this method, CT provides a view of conditions inside the object.
First, About Metrology
Parts are designed to specification for a reason; engineers calculated and decided the precise dimensions necessary to make that part work as efficiently and reliably as possible. That attention to detail is especially important in industry, where failing parts can lead to a dangerous or even life-threatening situation. Quality control and failure analysis are imperative to industries like aerospace technology, where slight miscalculations can cause a crash. Companies such as these use industrial metrology to make sure that all the parts in their critical equipment adhere to the industry standard for safest practices. Industrial metrology is the use of measurement in manufacturing to ensure that products are of the exact same dimensions as the engineer’s drawings for quality control purposes. Manufacturers invite inspections of their products to achieve this goal.
Computers have helped make this process a great deal easier, as they can perform difficult calculations and compare vast amounts of data in the blink of an eye. And more recently, scanning technology has enabled computers to build an entire 3D model of a subject in a relatively short amount of time. This development has been a great benefit to industrial metrology, as increasingly sensitive scanners render increasingly detailed 3D models for analysis and inspection – models so detailed and accurate that they can be used to measure features of the physical subject itself. When comparing the 3D scan of the test subject to that part’s CAD model, technicians can easily identify surface flaws and measure them for study or fixing.
3D scanning has grown in popularity as a non-destructive testing method for these reasons, but it has a certain shortcoming: 3D inspections cannot look inside of a part.
Shortfalls of 3D Inspections
Certain parts have internal components that are also capable of failing and so should also be subject to inspection. And often, those parts cannot be subjected to destructive measures because they need to be put back into service after inspections are complete. A 3D scan could only analyze and measure anything below the surface of a subject if the test material were cut open. Computed Tomography inspections are not limited in the same manner as 3D scanning.
CT Scanning: An Alternative
A Computed Tomography (CT) scan is an imaging technique that uses X-rays to look inside of a test material. An X-ray projector is mounted across from an X-ray detector (called a DR Imaging Panel) with the test material situated in between them. The machine rotates on an axis around the test material, taking multiple X-ray images as it does so. A computer translates that raw data into a projection during a process called tomographic reconstruction. Each projection shows a grayscale, cross-sectional view of the subject as if it had been cut through your chosen plane of section. Those projections are then compiled into a single 3D model for easy viewing and manipulation. Those 3D models can even be animated to simulate and analyze the tensions and stresses placed on internal components in a live-usage scenario.
If CT sounds like a medical CAT scan, that’s because the two are very similar. The same technology is being used by doctors to diagnose a tumor in the lungs or locate internal bleeding in the stomach. It is incredibly detailed, as the final 3D image is a composite made of data from many reference sources. Recent developments in complementary technology, such as faster computers with exponentially greater processing power and increasingly sensitive DR imaging panels, have made CT imaging a practical and available method for inspection companies.
CT inspections provide a precision at least comparable to that which 3D scanning brings, while also offering a more incisive look at the test material. Now inspectors can search for near-microscopic structural flaws beneath the surface of the test material, such as voids and cracks, and measure them in 3D for repair or further analysis. CT also has the distinction of providing results for multiple inspections while only performing one test: thickness measurements, defect analysis, and failure analysis can all be achieved through one CT inspection. The efficiency afforded by the comprehensive nature of these types of inspections drives down the amount of time spent on the test material and the final cost for clients.
Few companies currently offer CT scanning as an inspection service. It is notable for that reason that Applied Technical Services, Inc. has recently added CT scanning to its list of inspections provided.
For 50 years, ATS has supplied inspections, testing, and engineering consulting services to clients from a variety of industries. Our certified engineers and technicians are dedicated to presenting the most thorough and comprehensive analysis of the critical equipment that keeps our clients’ businesses going. With the addition of CT inspections to our already long list of services rendered, we are better able to achieve that goal. We will employ all of the medical precision afforded to us by our CT scanning technology to give you important information about your test material; allow us to give your equipment a clean bill of health with our industry-leading CT scanning tools:
ATS' Computed Tomography Equipment
- Northstar Imaging X5000
- Minifocus 450kV X-ray projector (0.016” Focal spot at 3mA)
- Dual energy capability with 225kV Microfocus X-ray Machine
- Can achieve focal size as low as 0.0002” (based on voltage)
- Multi-Axis Manipulator (x, z, tilt, rotation), capable of supporting max 250 lb
- Resolution of manipulator angle is 0.001°
- Capture elongated subjects unable to fit within a single exposure by scanning with a spiral acquisition
- Zeiss Metrotom 1500, with a 225kV micro-focus
- Chamber fits specimens up to 11.75 in (300mm) in diameter x 23.6 in (600mm) high. 50 kg (110 lb) weight limit.
- Annual A2LA calibration
- Certified to accuracy within 4.5 microns

Request Form
"*" indicates required fields
