- Home
- Services/IndustriesServicesindustries
- About Us
- LocationsStatesAccordion ContentAccordion ContentAccordion ContentAccordion Content
- Job Openings
- Quick Links
- ATS Family
How the Right CT Lab Can Help Serve Industrial Applications
Applied Technical Services is a respected industrial CT lab that offers clients our expertise in using this advanced imaging method to determine a wide array of information about their sample. Computed tomography, often called CT, revolutionized diagnostic medicine by allowing doctors to render more precise images of patients’ organs than could be achieved by traditional radiography or ultrasound, the two noninvasive options previously available. Improvements in the technology over the past several years have made CT commercially viable as an industrial nondestructive testing (NDT) method, meaning labs like ATS can now provide this high-resolution imaging solution to clients in many industries for a variety of non-medical applications, such as:
- Flaw Detection
- Complete Dimensional Inspections
- Thickness Measurements
- Porosity Assessments
- First Article Inspections
- Failure Analysis
- Litigation Support
- Quality Assurance
Additionally, since CT produces a 3D point cloud that our technicians can use to create a CAD or STL model, this scan can also assist in reverse engineering and finite element analysis (FEA) applications.
How CT Works
Our technicians first place the sample on a pedestal inside the chamber of our CT scanner. Once the chamber is closed, the machine begins by taking a single image of the sample by emitting X-rays at it. The denser the material in each region of the sample, the less energy gets picked up by the detector mounted opposite the emitter. The attached computer interprets this data as a tomogram, the characteristic black-and-white cross-sectional slice that we associate with an X-ray image, by visualizing the contrast in energy received from different sections of the sample — black representing denser material and white representing less dense material.
The scanner logs away this first image and then starts the process anew, moving the pedestal to present a different orientation of the sample for capture. A complete CT scan involves thousands of these tiny permutations to collect views of the sample from every conceivable side, angle, and elevation, which the computer can then collate into a voxel-based point cloud. Our CT labs then parlay this into a more usable file type from which they can make their assessments.
How Our Capabilities Stack Up
We maintain two powerful CT chambers to serve our clients’ needs:
- Northstar Imaging X5000
- Multi-Axis Manipulator (tilt, rotation, x, z, pitch, etc.), capable of supporting up to 250lb
- Spiral acquisition scanning scheme allows technicians to capture elongated subjects in a single exposure
- Manipulator angle resolutions as small as 0.001°
- Minifocus 450kV X-ray emitter (0.016” Focal spot at 3mA)
- Can achieve focal size as low as 0.0002” (based on voltage)
- Dual-energy capability with 225kV micro-focus X-ray Projector
- Zeiss Metrotom 1500, with a 225kV micro-focus
- Calibrated annually by A2LA
- They certified this instrument to accuracy within 4.5µm
- Chamber allows specimens as large as 600mm (23.6in) in height and 300mm (11.75in) in diameter
- Can hold up to 50kg (110lb)
The precision of our instrumentation allows our technicians to produce highly accurate models which we can use in a variety of applications mentioned above. The great advantage of using CT over another method is its versatility, as ATS can perform each of those services using a model created by a single scan. While measuring material depth, checking it for porosity, detecting voids or other subsurface discontinuities, and obtaining all relevant external measurements to determine compliance with its specifications’ geometric tolerance values would typically take four different methods of analysis, our CT labs can do it in one.
How ATS Differentiates Itself from Other CT Labs
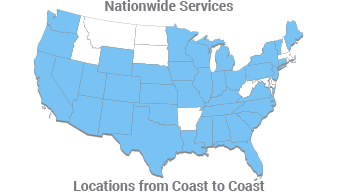
Since our founding in 1967, Applied Technical Services has expanded our field of knowledge, as well as our depth of expertise, to better answer the varied needs of our clientele. No longer just a trio of engineers aiding local businesses while confined to their shared office in our founder’s basement, ATS now serves clients operating in countries the world over from our dozens of locations with our testing, inspection, calibration, training, forensic investigation, and (of course) consulting engineering services. ATS performs all its services in compliance with our ISO 9001:2015 registered quality management system. We take pride in offering the best customer experience possible, ensuring every client receives accurate reporting in a timely manner, as well as attention and responsiveness throughout our testing process.
Materials, components, and subassemblies need to be inspected to ensure the quality of the finished product. Why not get more of that testing done with an accomplished CT lab like ATS? We take a closer look!

Request Form
"*" indicates required fields
